|
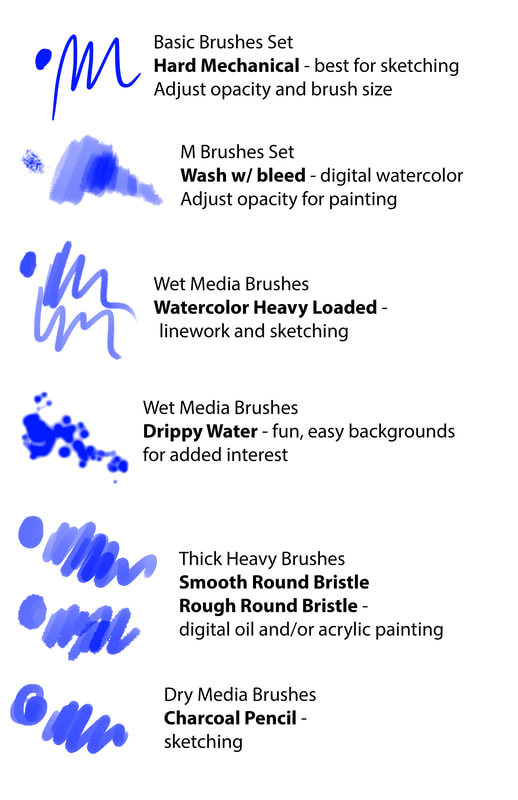
Choose an animal to recreate by digitally painting them using the stylus pen and Wacom tablet. You will want to try to match the texture, value and colors as closely as possible. The background could be realistic or abstract just using color or texture, but do not leave it white. You'll begin by finding a reference image or using one of your own images of an animal or insect. Open it up in PhotoShop. 1. Create a new layer. Fill that layer with white and move it under the Original Photo Layer. You will have to unlock the original photo. Label the "Photo" and "Background" layers. 2. Create a new layer and move it above the original photo. Label this layer "Sketch". Lower the Opacity of the original photo so you can see your drawing better. Use the Hard Mechanical brush which is good for sketching, or another brush of your choice. You can adjust the opacity so that it is lighter for a sketch where you can still see the details below. 3. Move the original image next to the sketch so you can view the original at the same time you're working on your illustration. To do this you need to have both photos open as separate documents in Photoshop, then go to Window on the top bar in Photoshop. Click on Arrange then select Tile Vertically. 4. Create a new layer for each part of your digital painting: a layer for the eye, nose or beak, feathers, etc. Each layer must be labeled correctly. Use the brush chart below for reference for different brushes that might be good to use for this painting. 5. When you're done with the animal, do the background by either creating an abstract background or drawing the natural background from the image.
0 Comments
Leave a Reply. |
AuthorB. Gates Archives
April 2019
Categories |
 RSS Feed
