|
Students will need to create a moving part in one of their pre-existing digital drawings or in a new digital drawing. This could include an eye blinking, a tree blowing in the wind, an arm waving, etc. Below are a couple online tutorials to help explain the process using Timeline in Photoshop.
Click HERE for a video showing how to create a blinking eye. This video uses a photograph and does not have any actual drawing in it, but you can see the steps used to create different frames for the video timeline. You will have to create new layers with different steps of the drawing showing the movement of whatever area you chose. I want at least 4 frames created showing different steps of the movement. In this video the artist chose only two steps and it is very quick and choppy. If you choose an eye blinking, think about the different steps: the eyes open, 3/4 of the way open, half way closed, 3/4 of the way closed, and then closed. ***This VIDEO shows an animated character blinking. It also has a drawing demonstration which discusses the importance of layering. *** GOOD VIDEO!! We are going to attempt animation in Photoshop. I have provided a variety of resources below that describe or show you how to do different effects using Timeline in Photoshop to create an animation. I want you to read the articles and watch the videos to see different possibilities for animation and then create your own animation. It doesn't have to be complicated. I just want you to explore Timeline and a variety of animation techniques that we will utilize for future projects. Below are very basic videos and step by step instructions about animating font and moving an object across the screen. You can also apply this knowledge to a drawing to create an animated image as well.
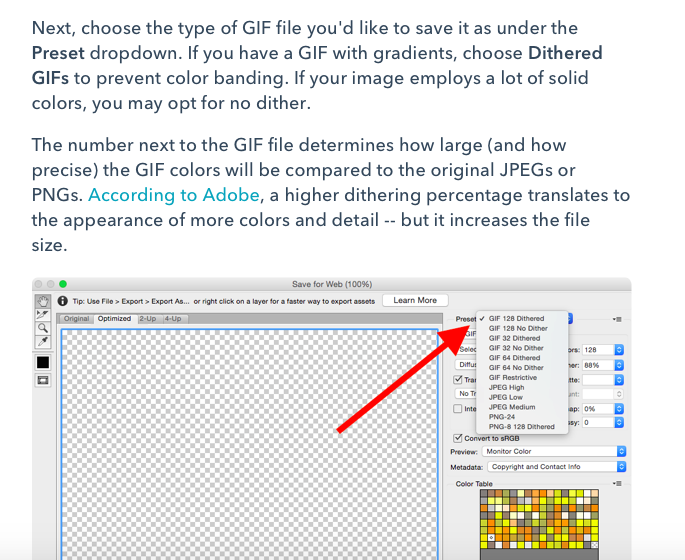
Watch this Introductory Video Read this Article on creating GIFs Watch this VIDEO on Creating a GIF - animating text Choose either song lyrics or an album cover to illustrate in an original design. You can choose to include the lyrics superimposed over the image if you choose to.
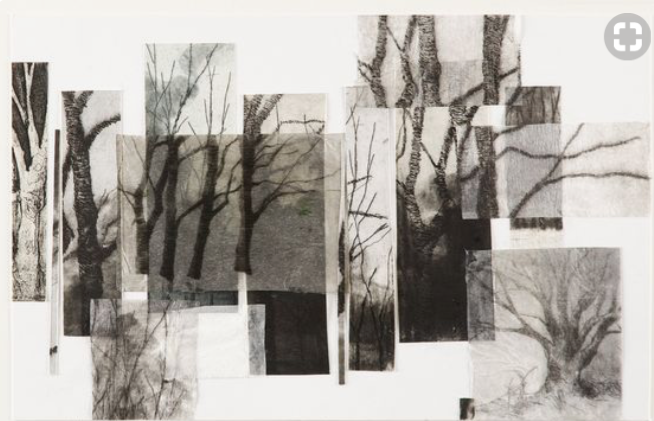
Due to Inventory visits we will be without our laptop cart for an undisclosed amount of time. I am going to list some options for photography projects that you can do alone or as a group since we will not have access to our computers for an unknown period of time. I am guessing that we will only have time to complete one of these projects, but depending on time, we may be able to complete more than one. If you or your group complete more than one project, any additional work will be counted as extra credit. Documentation of a Quiet Space:Working ALONE, I want you to find quiet spots within this school to document. Our school is busting at the seems with students at all times. It's rare to find an empty hallway or an empty courtyard or a completely quiet classroom with students who are diligently working. I want you to try to capture quiet spaces within our school showing the best of what our school is. Try to emphasize the architecture or the classroom spaces within the school. www.aestheticamagazine.com/documenting-quiet-spaces/ Recreate a famous work of art in a modern motif:Working in a group (only enough people to be in the actual photo - this project could be done alone as well) pick 1 or 2 famous works of art and try to put a modern spin on them using actual people and props to set up the same composition. The image you take should definitely resemble or represent the original work of art but the people and the clothing or the space could be more contemporary. Celebrating DiversityOur world is one full of diversity and our school represents a small portion of that world. At school, working alone or with one other person, I want you to engage with other students here that represent various cultures, races, and sexual orientation to document the beauty of diversity in our student and staff body here at SPHS. Try to get either group shots showing a wide diverse group of students that may not normally pose together and are not already a close group of friends. Set up your shots so that there is a minimal amount of background distractions. Be kind and respectful and try to see the beauty in the different clothing we choose to wear, the different hairstyles, the different body types, facial expressions, etc. Each participant in your photos should be actively participating in them - not randomly walking up to someone and taking their picture without permission. Avoid cliche, cheesy group photos. You can create a collage of individual faces or create one or two groups shots showing a diverse group of students (maybe sitting on different levels or staircases for example....) Choose a theme and create a rhythm in your composition by overlapping images of the same theme using different opacities. See directions below the example:
Directions:
- take a series of photos of a subject matter of your choice as long as it's a theme - edit those photos - crop some very tightly and of varying rectangles, change the opacities of your photos or turn some into the negative color scheme. Try to keep your color scheme simple: black and white or sepia tones or a color of your choice. - In Photoshop, go to FILE, then NEW, choose your size and image resolution and it should open a blank document. - to place photos, go to FILE, then PLACE EMBEDDED, choose your photo, change the size and location of that photo within the composition by pressing the "shift" button while you drag the corners to the size you want it to be. Use your curser to move the image within the composition. Press enter once you have it placed in the right location. -if you want to move that image you just placed, you will need to select that image in the correct layer. Then press the "command" button and the "T" button at the same time to select the image to move and resize. Take close up portraits of some of your classmates. You can use any type of lighting you choose, but make sure to compose as a close up composition. Post 3 portraits of different individuals to your website and include a list of 5 words in the caption section of each photograph to describe that person. 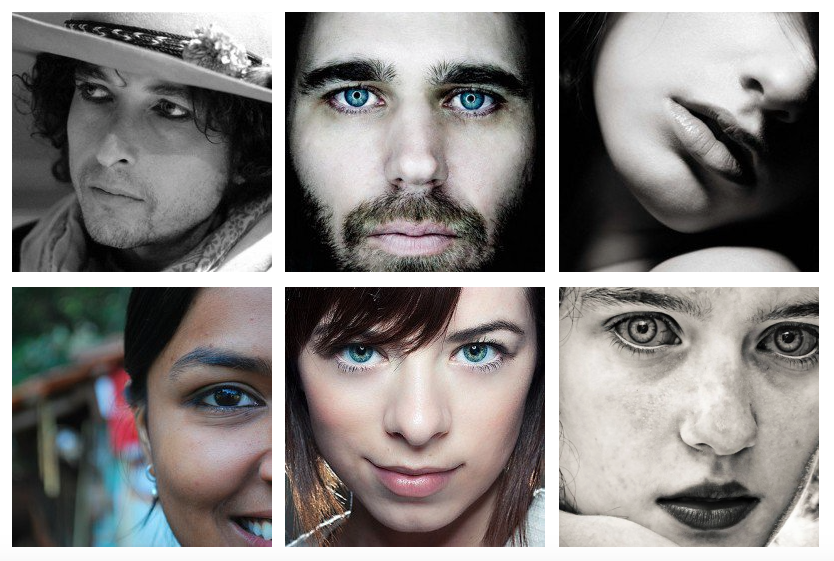 This year's On My Block project's theme is Did You Ever See...? You are tasked with creating an artwork based on that theme. It could simply be a photo that represents something in your neighborhood that you want to bring attention to, or it could be about something that is unique to only your neighborhood, or maybe it's a strange perspective of something in your neighborhood. You can take a photo, create a photo collage, do an illustration. etc. Any digital project is acceptable.
**This is not an assignment - just video tutorials that you can use**The following tutorial videos show how to add a blurred background in Photoshop.
www.youtube.com/watch?v=F4SUMa7bV10 www.youtube.com/watch?v=A9rkkW9Zi48 www.youtube.com/watch?v=to3EXCPfY4w |
AuthorB. Gates Archives
April 2019
Categories |


 RSS Feed
